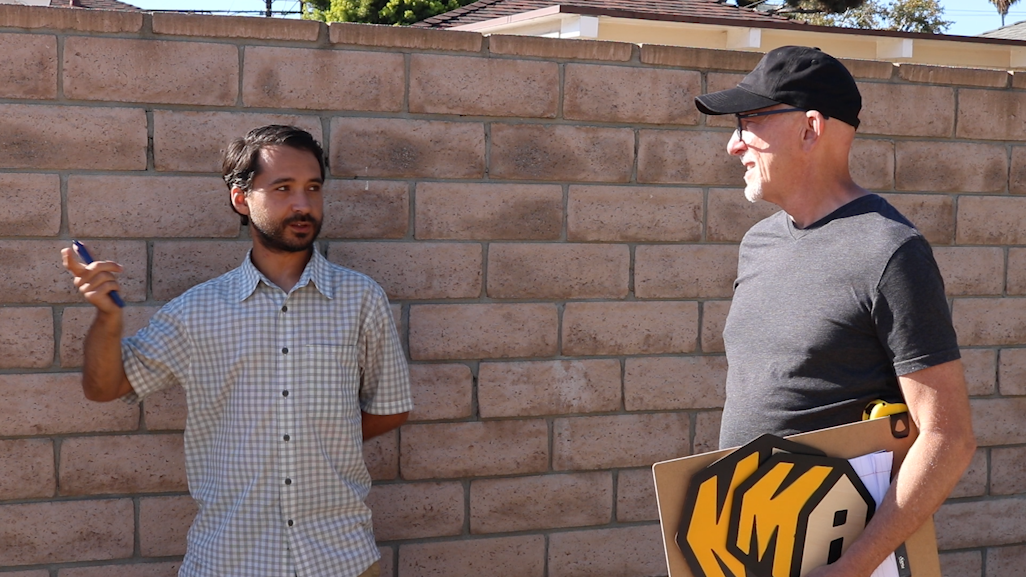
It’s Episode 2 of “Keeping Up with Boris”! We’re taking you through each phase of designing, permitting, and building an ADU for Boris, a homeowner in Santa Monica, CA. Lyle Boatman, holding the signs in this photo, will design the unit.
Boris and his wife Dorothy are building an attached accessory dwelling unit to rent for income. Even though it will be attached to the garage, not the main house, it is technically an attached ADU.
A site measure is the first step in your accessory dwelling unit design
The site measure is a comprehensive documentation of all the elements on your property. Its purpose is to show the city exactly what is on the lot now and what you’re planning to build.
Boris’s house was built in 1944. With many older houses, it’s not unusual for the city to have no idea what is currently on the lot. Additionally, the jurisdiction may have changed from county to city at some point, so the city may not have any records of the property at all.
A site measure can be done by your designer or supervised by the designer and done by a contractor or surveyor. The process usually takes about two hours but may take longer depending on the size of your lot and the existing structures.
A site measure includes:
- Discussing the placement of the ADU
- Measuring the lot and determining its boundaries
- Measuring the interior and exterior of existing structures
- Identifying building code violations in existing structures that will need to be repaired
- Scoping the slope of the lot
- Locating sewer and water lines
- Scoping where the ADU sewer will run
- Locating electrical and gas lines
- Confirming the capacity of the existing electrical system–will the panel need to be upgraded?
- Determining whether other surveys will be needed. These most often include a soils engineering report, topographical survey, or a survey to identify the legal property lines
As we saw in the Introduction to Keeping Up with Boris, originally there was a swimming pool in the backyard where Boris wants to put the ADU.
Before Lyle visited Boris’s property with his tape measure, Boris needed to have the empty pool filled and the earth compacted sufficiently to support the weight of an accessory dwelling unit.

A contracting company filled in the pool, and a soils engineer provided a report certifying that the compaction met California building code standards.
Boris also cleared the tree and shrubs at the rear of the lot. With that complete, Boris and Dorothy were ready for their site measure!
Placement of the accessory dwelling unit

This google satellite view of Boris’s property was taken before the pool was filled. His wish list for the ADU:
- 2-bedroom, 1 bath, 680 sq ft
- attach the ADU to the garage and have it extend across the back of the property
- maximize privacy between the ADU and Boris’s house
- place windows and doors on the sides of the ADU not facing Boris’s house
- private yard space for the ADU
How will the tenant access the ADU? On the satellite photo you can see a narrow path going up one side of the house.
“But if they go that way they’re walking right past our living room windows and one of the bedroom windows,” Boris said. “Since they’ll be parked in the driveway, I think they should walk up the driveway and then up the existing path past the garage.”
“We can plant a hedge next to the path to maintain privacy for your backyard,” added Lyle.
Measuring the lot and existing structures
During a site measure, the designer walks the property to measure its perimeter, determine where the property lines are, and decide whether the lines will need to be verified separately in a property survey.
This may be necessary if the ADU will be situated on a property line, as are some garage conversions, or if there is an ambiguity about the property lines that could in some way impact the construction of the ADU.

Your city will require exact measurements of all existing structures on your property. Lyle and his assistant measured every inch of Boris’s main house, down to the inside of the closets and all windows and doors.
They measured the exterior and interior of the garage as well. These rough drawings will become detailed schematics. “Schematics” are floor plans. The city requires schematics of the existing structures to be included with the architectural plans for the ADU.

Identifying code violations in the existing structures
During the course of building an ADU there can be as many as 15 city inspections. Each time an inspector comes to your property, they’ll be looking around for code violations not only in the new construction but also in your primary house.
You will need to repair any code violation in the primary home before the city will issue your ADU its Certificate of Occupancy.
One goal of the site measure is to identify these violations so you can get them fixed either before you begin building the ADU or during its construction.
Typical code violations are windows or doors that were either added or sealed off without permits. In the photo below—which is not Boris’s house—you can see where a door was removed and a window put in without a permit.

Changes much less obvious than this are instantly apparent to city inspectors. They know that unpermitted work often happens at the rear of the house and they can spot telltale signs like minor differences in the stucco finish.
Boris’s house has a bedroom addition from the 1980s that Boris has confirmed was legally permitted. But the foundation has some water damage. Boris can get that repaired at the same time the ADU is being built.
Scoping the property’s slope for sewer lines and water drainage
Plumbing is always a major consideration when designing accessory dwelling units. The big issue is the sewer line. As is the case with many properties, the main city sewer line is in the street in front of Boris’s house.
For sewer lines to work, there needs to be a downward slope of at least ¼ inch per foot so gravity can pull the sewage toward the main city line. If there’s not sufficient slope, you’ll need to install a sewage ejection pump. Boris wants to avoid that.
As Lyle surveyed the property, he and Boris discussed putting the ADU on a raised foundation instead of a slab to get the toilet and other fixtures high enough off the ground to achieve the necessary slope.
- Advantage of a raised foundation: you can get under the house to fix a leak and maintain the plumbing.
- Disadvantage: you’ll need steps going up to the ADU’s front door. If you need a unit that’s wheelchair accessible, you’ll have to build a ramp.
“Some people worry about rodents under raised foundations, but if all the access points are properly installed, that shouldn’t be a problem,” said Lyle.
Lyle and Boris spent 20 minutes trying to locate the home’s sewer line. While they did find some sewer clean-outs, they couldn’t be sure exactly where the lines were. They’ll need a sewer “track and locate” camera inspection to determine the location.
Lyle decided to order a topographical survey so they will know exactly what the lot’s slope is. “The topo survey is also important for rainfall management. My design will include a drainage system that ensures rainwater won’t run back to the ADU and flood it.”
In the satellite view you can see how rainfall from the garage roof and the roof at the back of the main house could run off into the backyard and toward the ADU.
Scoping the electrical utility
There are power lines running across the rear of Boris’s property. That’s typical of single-family lots in the Los Angeles area.
- All electrical utility companies have what are usually called “easements,” a section of the lot that must be clear to allow maintenance crews access to the power poles and lines.
- The number of feet in the easement depends on your utility, but they are usually 5 or 6 feet.
- You’re not allowed to have a habitable dwelling within a utility easement.
- Some utility companies also have rules preventing you from building within an additional buffer area from their easement, for example, an extra 10 feet. In those cases you’ll need to get an encroachment permit from the utility (not the city) in order to build. This is an important item to confirm in the planning stage.
On Boris’s lot, “given where the power line is, 10 feet from the back fence looks like a safe place to put the ADU,” said Lyle. “That will create a private yard for the tenants at the rear of the lot.”
The electricity for the main house is buried in a conduit, which is good news. It means Lyle won’t have to worry about overhead electrical lines to the main house being too close to the roof of the ADU.
Boris’s electrical panel will need to be upgraded to provide enough power for the ADU. He wants to have a separate electrical meter installed, making it easier for his tenants to pay their own utilities.
The accessory dwelling unit will be an all-electric home, so Lyle didn’t need to scope the natural gas lines. However, the contractor will need to locate them so they can avoid rupturing them during construction.
The sewer “track and locate” camera inspection
Two weeks after the site measure a technician did a “track and locate” camera inspection on Boris’s sewer system. By running a video camera on a cable through the sewer line and using an instrument that measures the depth of the pipe with sonar, the technician was able to locate the path of the sewer pipe and its depth at different points on the property.

With that info, Lyle tentatively determined that the best plan is to build the ADU on a raised foundation and run the unit’s sewer pipe down the middle of the driveway so it can connect with the home’s main pipe in the front yard.
They’ll cut a trench through the concrete and replace that part of the driveway with permeable pavers, which are better for rainwater drainage.
Next step: A programming meeting to get more design details

Boris’s site measure went relatively smoothly. “The only real surprise was the sewer,” said Lyle.
The topo survey will clarify the drainage situation, but Boris and Lyle don’t need to wait for it to schedule a virtual programming meeting. And that’s where the real fun begins!
Lyle will review with Boris all aspects of the accessory dwelling unit design: style, floor plan, windows, access, storage, finishes, and much more. Several weeks later, he’ll present Boris and Dorothy with schematics of their ADU, which they can discuss and adjust as necessary.
Stay tuned for Episode 3: ADU Floor Plan Schematic Design Meeting!
Maxable makes planning, hiring, and building your accessory dwelling unit simple.
Want to explore your options on how to get started on your ADU? Our team is here to help connect you to the best local designers and builders for your ADU project. It all begins with an ADU Planning Phone Call. Talk to you soon!